Sunday, December 28, 2014

Homemade Cleaner Crackers in 15 minutes or less!

With the new year approaching, I see a lot of people are ready to make a change in how they eat.  I can relate.  That is why I started this blog earlier this year.  Well that and for myself too to remember all the cleaner eating creations I come up with. (haha)  Today I made one of our weekly soups(white bean and kale) for our lunches and thought to myself I wish there were a better cracker or something to go with it.  So, naturally I got in the kitchen to see what I could come up with.  


Ingredients:
(Yields 30 or so crackers)


  • 1 cup of oat flour (ground from steel cut oats or old fashioned oats)
  • 1/4 tsp of salt
  • 1 tbsp. of ground fresh rosemary
  • 1/4 cup of water
  • 1 tbsp. of olive oil
  • Optional: Chia seeds
  • Optional: Onion powder


That's it!


First Break out that ninja or whatever tool you have to grind down your oats into a flour.  Then follow the method below!


       Method:

  1. Mix all ingredients in a bowl until well blended.  Make sure your dough is good and sticking together forming a ball. 
  2. On a board, put an additional tablespoon or so of flour. 
  3. Put your dough out and roll it to it about 1/4 in thick with your rolling pin.
  4. Cut into squares.
  5. Top with any additional things you want. I.e. chia seeds, onion powder, garlic powder, Cajun powder, etc.
  6. Put on a baking sheet and bake at 450 for about 10-12 minutes or until the corners turn brown.


If you want a sweet kind of cracker, add a tbsp. of honey or maple syrup and some cinnamon. :)

These crackers are so easy to make, and so delicious! They may only store for a couple or so days because they are fresh made. Although in my house, they only last a few hours ;)

Enjoy these crackers with one of my soup recipes, hummus, guacamole, or just by themselves for a healthy snack to get you through the day!


 Here you see my dough rolled out to about 1/8- 1/4 in thin. I topped my crackers off with chia seeds. Chia seeds are ridiculous healthy folks! You can find them in the bulk section of your grocery store or at Whole Foods(here in central Arkansas, you will probably have to take the trip to WF).  I think my next batch I will top them with some raw sunflower seeds.  


Final product! 
These crackers are definitely thick enough or strong enough for you to pack on some hummus or dip of choice (healthy dip).  I have a couple of recipes listed on my blog earlier in the year for a ranch type of dip, guacamole, and a hummus recipe :)  
Enjoy Friends!
Cheers everyone and good luck on your cleaner eating journey! Remember, if you ever have any questions, I am here to answer them!


Thursday, December 18, 2014

Bone Broth Is More Than Just Tasty

Ever wondered why chicken soup seems to make you better when you're sick? It's because chicken contains a natural amino acid called cysteine, which can thin the mucus in your lungs and make it less sticky so you can expel it more easily. Processed, canned soups will not work as well as the homemade version made from slow-cooked bone broth. 

Making your own bone broth is extremely cost effective, as you can make use of left over carcass bones that would otherwise be thrown away. And while the thought of making your own broth may seem intimidating at first, it's actually quite easy. Bone broth provides you with a variety of important nutrients—such as calcium, magnesium, chondroitin, glucosamine, and arginine.

I make bone broth every couple of weeks and freeze it to have on hand for making all of my soups.  I even use it to make my sauteed veggies and casseroles too.  Today I ran to kroger and picked up my organic free range chicken and decided I needed to let you all in on this secret:) (It's not really a secret, but maybe you all thought it was more difficult that it really is ;)  Anyhow, here's my method and my advice above on why and how to make good bone broth!

Ingredients:

  • 1 whole free range organic chicken
  • 6 stalks of celery
  • 1 onion
  • 3 tbsp of garlic powder
  • 3 tbsp of onion powder
  • 3 tsp of salt
  • 3 tsp of pepper
  • 3 tsp of dried sage

Method:

  1. Remove the skin from the chicken.
  2. Cut the chicken into atleast 3 parts. ( I start by cutting it straight down the breast bone)
  3. Divide the chicken into 3 pots or one big pot if you have one.
  4. Put 2 stalks of celery, a quarter or more of the onion, 1 tbsp. of onion and garlic powder, and 1 tsp of salt, pepper and dried sage to each pot.
  5. Boil for a couple of hours.
  6. Once the broth cools down, debone the chicken and freeze it in seperate bags than the broth. (discard the bones)
  7. Pour your broth is big freezer storage bags and freeze.
  8. Use at your convience in soups, sauteeing, casseroles, etc.
It's just that easy! I hope you all make tons of bone broth and use it weekly to improve your overall health! It's a miracle food, not just a super food!! Merry Christmas all!


Monday, December 15, 2014

The Easiest and Best Granola You'll Put in Your Mouth!

So, we are back in full swing with our super crazy healthy lifestyle after a few months of falling of the wagon a bit. It's funny because our "falling off the wagon" just means we ate more pasta, bread, a little pizza here and there, and maybe some sweets a couple times a week! Oh and I did enjoy a few more frap's from Starbucks that I should have! (;
We laugh at ourselves too, so don't worry.  Even on our worst meal, we never eat fast food or total junk food.  Anyhow, today I am blogging about the most delicious granola you'll ever eat!  I decided to go back to making this for my family to stop buying cereal, to use on our yogurt and/or to simply eat as a snack if I want it.
It's so simple to make and a ton cheaper than the pre-made bags of granola on the shelf AND way better for you!  This recipe is so stinkin healthy I am begging you to make it!


Ingredients:

  • 1 cup of old fashioned rolled oats
  • 3-4 tablespoons of pure maple syrup or raw honey or agave
  • 2 tablespoons of melted coconut oil
  • 1/4 cup of pecans
  • 1/4 cup of sunflower seeds(raw)
  • 2 tsp. of cinnamon

That's it! Super simple.  Now, you can add more oats, nuts or seeds to this recipe easily! It's so versatile!

Method:

  1. Preheat your oven to 200 degrees.  
  2. In a large bowl, but all DRY ingredients in. That's everything but the coconut oil and the sweetener of choice.
  3. Stir.
  4. Mix your sweetener(honey, maple, or agave) with the melted coconut oil and blend well.
  5. Pour over the dry mixture in the bowl and make sure everything is coated.
  6. Pour onto a baking sheet and bake for about an hour or so.  Stir every 15-20 minutes on the pan to make sure it's not burning. 
  7. Done. Let it cool a bit and EAT IT!


You can enjoy this granola over yogurt and fruit, in a bowl with some milk(cereal.ha), or simple eat it right out of the palm of your hand!
I even cut up some dry prunes in mine. It's super delish! The best thing about prunes over other dried fruits like cranberries is that prunes are naturally sweetened. Cranberries almost always have added sugars, whether it's from "apple juice" or not..it's added sugar to that apple juice too. See, they try to get ya! Prunes are super healthy and low calorie, low fat, but really quench the sweet tooth. As does this granola recipe! TRY IT!!! Then tell me how you liked it please :) Thanks guys! Merry Christmas!

Sunday, December 7, 2014

Cleaner Mexican Casserole

Hello friends and fellow food lovers! It's been a little bit since I've posted a new entree recipe, but wait no more! This one should make up for my absence for the last few months! :) This recipe that I came up with is packed full of nutrients, low in calorie, low in bad fats, and low in sodium BUT packed with FLAVOR! 


Interested Now? 


This may be surprising to the people who know us well, but my husband was recently reminded of his high blood pressure and high cholesterol levels, so even though we eat pretty healthy, we still need to make some adjustments, like cutting out even more salt that we already do.  As we all know, salt makes everything better right? Well, in this recipe you won't miss it much! 

This recipe is a process. Start it early in the day so you can cook your beans from scratch and your quinoa. Quinoa only takes about 15 minutes, but the beans take 90+ minutes.  This is also a dish that will make 6 or more servings depending on how much you LOVE that first bite! 

Ingredients:

For the beans:

  • 1/2 lb of pinto beans cooked from dry(takes about 90 minutes)
  • 1 tsp of garlic powder


Method:
Once cooked, drain most of the liquid and puree the beans. (I used my Immersion 
hand blender)


For the vegetable filling:

  • 2 ears of fresh corn-cut kernels off
  • 1/2 an onion
  • 1 tomato
  • 4 cloves of garlic minced
  • 1 tsp. of cumin
  • 1 tsp. of garlic and onion powder
  • 1/4 tsp. of salt (500 mg of sodium)
  • 1/4 tsp. of pepper


                                                                                                        Method:


Once all vegetables are chopped, add 1 tbsp. of extra virgin olive oil in a sautee pan and sautee all ingredients for about 10 minutes.


For the quinoa:

  • 1/2 cup of dry quinoa cooked(cook like rice. 1/2 cup of quinoa is cooked in 1 cup of water)
  • 1 Tbsp. of cumin
  • 1 Tbsp. of onion powder
  • 1 Tbsp. of garlic powder
  • 1 tsp. of chilli powder
  • 1 tsp. of cayenne pepper
  • 2 tsp. of salsa of your choice (220 mg. of sodium)
  • 4 tbsp. of minced cilantro
  • 2 tbsp. of minced parsley
  • 1 tbsp. of plain nonfat greek yogurt


Method:
Cook quinoa as directed. Once fully cooked, add all other ingredients and stir well. No additional cooking needed.


        Additional ingredients:
  • 3+ tbsp. of minced cilantro
  • 1/4 cup of chopped green onions
  • 1/4 cup of shredded cheese (190 mg. of sodium)
  • 1 tbsp or so of lemon juice
  • 8 corn tortillas(I used organic. Organic corn tortillas are made from stone ground corn, water, and lime juice. Other store brands have 12+ ingredients) 


Now, Method in layering your casserole.

  1. Get your 9x13 casserole dish ready. 
  2. Put one scoop of your beans on the bottom and spread thin.
  3. Put 3 tortillas down. You may have to cut one in half and layer them that way.
  4. Then scoop another layer of beans in, layer the cooked veggies, then a layer of tortillas (use  tortillas here)
  5. Next scoop more beans on and spread out. 
  6. Layer with the quinoa and veggies.
  7. Repeat each layer until you run out of ingredients.
  8. Top the casserole with any remaining fresh herbs, chopped onions, and the 1/4 cup of cheese.
  9. Bake at 350 for 20 minutes. Done.
  10. I am serving mine up for dinner with some fresh made guacamole made with just avocado, lemon juice, cumin powder, and pepper. 


This is the 3rd layer in. Layer as you like and feel free to add more fresh tomatoes or herbs. 

Omg. First bite is delicious!


Here's a good shot of how your layers should turn out :) Enjoy!!!


Saturday, October 4, 2014

Just in time for Pumpkin Muffins :) Happy Fall Y'all!

Well hello there! It's been months since I last posted due to a very demanding school, life and work schedule! But after being messaged or even now approached in person about my lack of posting, I decided to post my most recent muffin recipe that I created for my 2 year old. She is addicted to these muffins. Seriously, I even have to limit her because if not she would eat a dozen a day!
I know I have posted a recipe similar on here for my banana muffins, but these are a bit different.  If you aren't aware of how crazy healthy that pumpkin is for you, here are a few facts! 

Low-Calorie While Helping Fill You Up-One half-cup of canned pumpkin has about 40 calories. 
Source of Healthy Fats-When using fresh pumpkin to cook, it's important to keep the seeds. They are a rich source of nutrients, including unsaturated fat, antioxidants, and fiber. Pumpkin seeds are a natural source of protein with nearly 12 grams per cup, along with other vitamins and minerals, especially zinc. They deliver almost half of the daily recommended intake of zinc. You can simply roast your pumpkin seeds in the oven with a little cooking spray, then toss them in your salads, mix them into your granola, or eat them alone for a snack.
High Vitamin A content-Vitamin A is essential for healthy, glowing skin, strong eyesight, and our immune system.
High in Inflammatory Reducing Beta-Cryptoxanthin- provides several health benefits, including a reduced risk in developing inflammatory diseases, such as rheumatoid arthritis. Pumpkin is ranked among foods with the highest levels of beta-cryptoxanthin.
Provides 500mg Of Potassium-Potassium is an essential mineral we need to keep our hearts and muscles working at their optimal levels. One cup of pumpkin delivers around 550 mg of potassium, making it one of the highest sources amongst fruits and vegetables (bananas bring in about 420 mg, and sweet potatoes bring in about 475 mg). Try adding pumpkin to your post-workout snack or meal for the extra potassium boost, which may aid in muscle and electrolyte recovery.
I use a can of PURE PUMPKIN PUREE, NOT PIE FILLING! Although we often think fresh produce is healthier than canned (and oftentimes, this is true), canned and fresh pumpkin can be used interchangeably in recipes, and deliver health benefits. I hope you enjoy eating some more pumpkin this fall.

Now for my recipe.. It's very simple.
Ingredients:
  • 2 cups of oat flour or wheat flour(all purpose)
  • 1 can of pumpkin puree
  • 1 1/2 tsp. of baking soda
  • 1/2 tsp of salt
  • 1/4 cup of brown sugar
  • 1/4 cup of maple syrup or raw honey
  • 1/2 cup of unsalted, melted REAL butter
  • 2 tbsp. of virgin coconut oil
  • 2 eggs
  • 1 tsp. of pure vanilla
  • 2 tsp. of cinnamon
  • 1/2 cup of chopped pecans (optional) or
  • 1/2 cup of 60% or higher chocolate chips
Method:
Set oven to 375 degrees.  I use no special method to mix ingredients.  I simply throw all ingredients into one bowl and mix until well blended.  I use an ice cream scooper to fill my muffin tins so each muffin turns out about the same size.  Bake for 18-20 minutes depending on your oven.(I start toothpick testing at about 15-16 minutes).  That's it!

Recipe makes about 18 muffins.

Calories: 90 per muffin
Saturated fat: 1.2 grams per muffin(and these are healthy fats, even the butter if it's REAL butter)
Sugar: 7 grams of sugar per muffin

I also would like to add some facts about how great cinnamon is for you and to add to your diet as much as possible.  It's a major antioxidant AND it IS delicious right? :)

Cinnamon holds the following:
Anti-clotting agents
Anti-Microbial Activities
Blood Sugar Control
The scent of Cinnamon has been proven to boost brain function
Colon and Heart health

Okie doke. I hope to post again soon.  I have so many recipes to blog about. Just because I've been absent here does not mean I have neglected my cleaner lifestyle. Thanks guys! Enjoy:)

Thursday, June 12, 2014

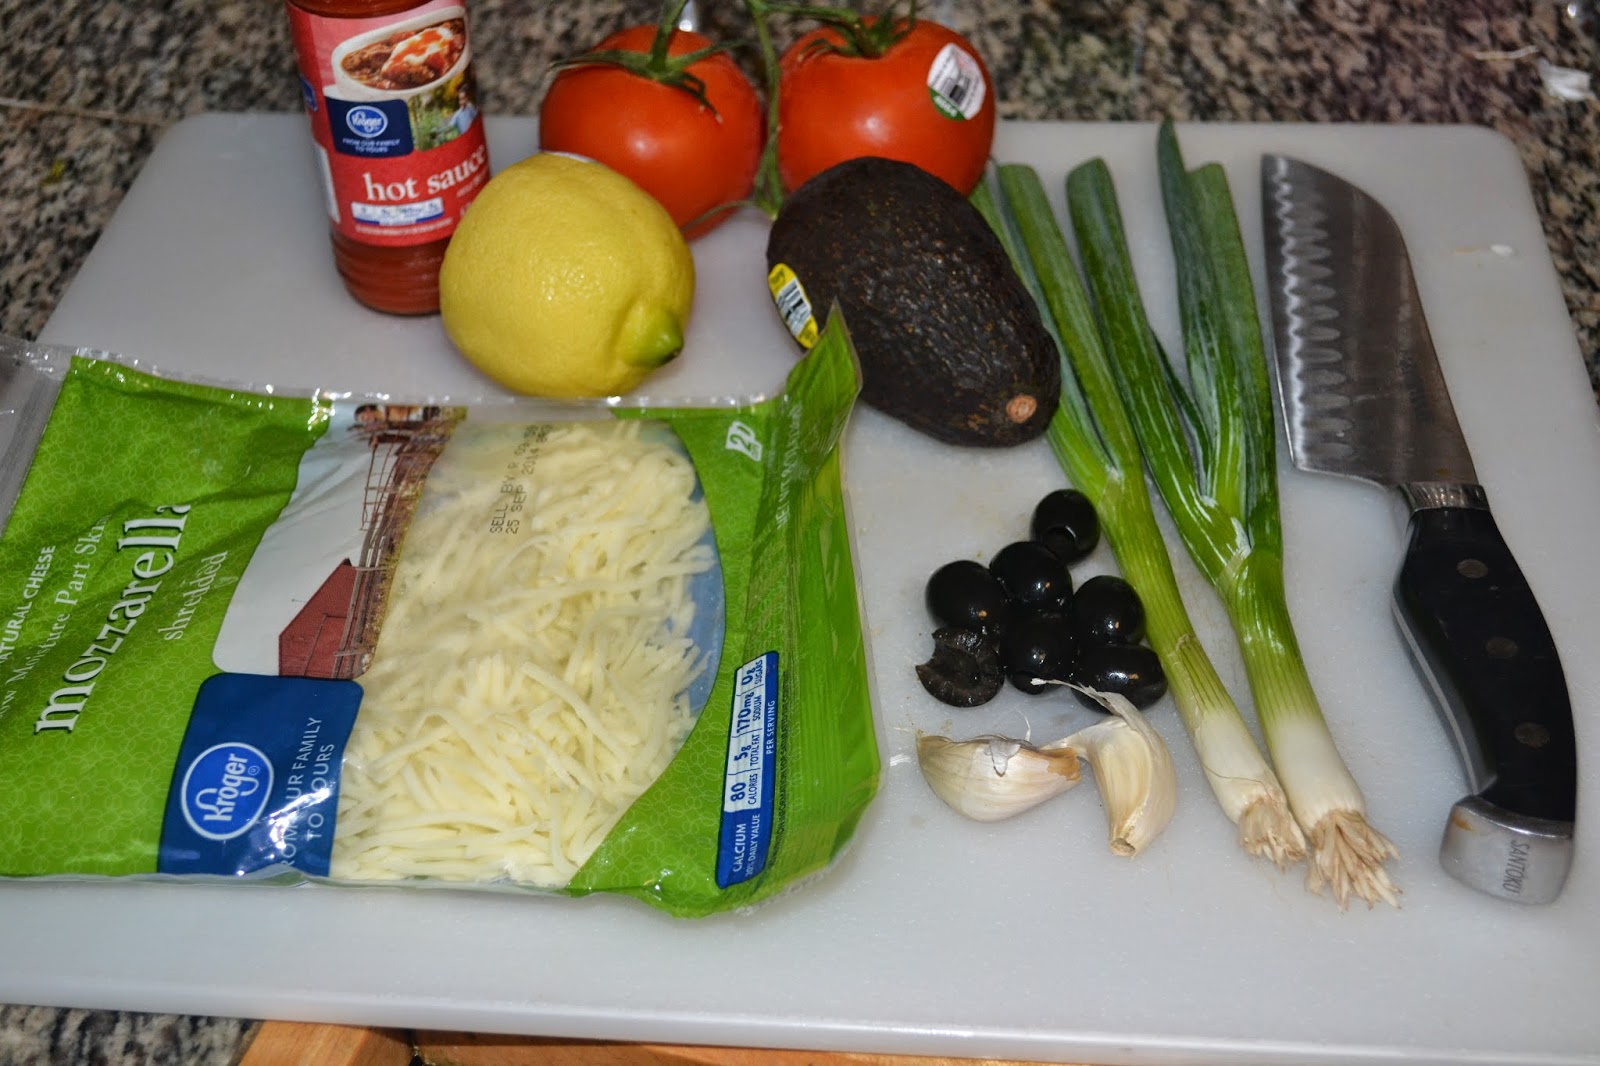
Loaded Chicken Nachos-400 Calories!

Hello everyone! I hope everything is going well and you are all having a great summer so far! What I have for you today is a recipe that I wrote for my most recent article in Savvy Kids Magazine.  Everyone loves nachos right? We just don't like the aftermath of feeling guilty about consuming all the fake cheese, high amounts of sodium, tons of calories and high amounts of fat! Here is your summer solution! 

You could easily cook the chicken for this recipe in your crock pot to avoid heating your house up.  If you do that, I recommend cooking it with some canned diced tomatoes(Rotel).
Or, You could also skip the chicken all together and have a veggie nacho plate with black beans as your star!  Again, you can totally cook those in your crock pot from a dry bag to prevent heating your house up:)  


How's that look for 400 calories?


Clean‘er’ Loaded Chicken Nachos


Yields: 2 servings


  • 1 chicken breast
  • 4 whole wheat tortillas(2 per serving)
  • 1 tomato, diced
  • ½ cup of skim-milk mozzarella
  • 2 green onions
  • 1 tsp. of hot sauce (or to taste)
  • 2 minced garlic cloves
  • 1 avocado
  • 1 tsp. ground cumin
  • 1 tbsp. garlic powder
  • ½ tsp. of salt
  • ½ tsp. of pepper
  • 10 black olives sliced (or to taste)
  • 1 tbsp. of olive oil


Directions:

NUMBER 
First, preheat the oven to 350° F to make your own tortilla chips. Lightly brush the whole wheat tortillas on the upward facing side with oil and sprinkle with garlic powder. Place the tortillas on cookie sheets or pieces of aluminum foil and bake for 12-15 minutes or until crispy. Once done, cut into triangles. Each tortilla should make 6-8 large chips.

While the chips are baking, heat a nonstick pan on medium heat and cook chicken breast until done. Season with 1 tablespoon of garlic powder and ½ teaspoon of salt and pepper.  

Shred the chicken while it’s still in the pan, add hot sauce and stir. Add the mozzarella until melted, and then turn off heat.

Guacamole is a key part to this dish! Combine avocado, minced garlic and cumin powder and mix well until creamy. Done! 

Now, just dice all other vegetables and layer your nachos. You may also add lettuce, spinach or any other vegetable you desire. Black beans would be a great addition to this dish as well!

This Clean‘er’ Loaded Nacho dish comes in right at 400 calories for the entire plate! It’s filling, delicious, low-sodium, low in saturated fats, low in cholesterol and loaded with flavor!! 

I hope you all enjoy!! We have had this one several times in my house since it's creation! :) Have a great weekend!


Tuesday, May 20, 2014

Cheesy Stuffed Sweet Peppers

This momma has been busy! But having fun at the same time. :)  My boss recently decided to start a non-profit organization that brings awareness to violence that's happening to our children around the world, also known as M.others A.gainst V.iolence.  She appointed me to head up the organization and so I have been planning our first event which will take place in November!! We are having a family festival, and it is going to be amazing! It's kinda crazy that I am planning and organizing a city festival all on my own. Very cool. :)  Anyways, enough about me and what's happening with work. Just needed to clarify that I have not given up on my cleaner recipes and food blog.

Tonight's dinner included a random creation inspired by stuffed peppers. Usually they contain beef, tons of salt, and a sauce of sorts.

Mine contains just a few simple ingredients and is incredibly easy to make.

Teaser photo now:


Did you know??
One small red, yellow or orange pepper provides three times the recommended daily allowance of vitamin C; way ahead of citrus! Red peppers stand out as one of the few foods that contain lycopene, a carotenoid that lowers the risk of various cancers, including prostate and cervical cancer. These crimson packages are also packed with beta-carotene, converted to vitamin A in the body and essential for night vision. Nature’s best source of zeaxanthin, a compound known to protect against cataracts and macular degeneration, can be found in orange peppers.
This is just a few facts about this delicious food!

Recipe:

Ingredients:


  • 6 Peppers (you can easily double this recipe as needed)
  • 1/4 cup of mozzarella (I also used the rest of the cheese stick my toddler didn't finish)
  • 1/4 cup of cooked rice
  • 1 minced garlic clove
  • 1/2 tsp. of salt
  • 1/2 tsp. of pepper
  • 1 tsp. of dried parsley

Method:
  1. Cook your rice.
  2. Remove tops to your peppers and pull seeds out.
  3. Once your rice is cooked, add all other ingredients and mix well.
  4. Stuff the peppers.
  5. Bake on 400 degrees for 20 minutes.

These little stuffed peppers are packed with flavor, super easy to make, filling, inexpensive to make, and very nutritious! They are also low in calories, fat, sodium...and high in essential vitamins and nutrients.  I hope you all enjoy this one! 

This dish serves perfectly as a side or even some yummy game day foods! :)


Sunday, May 11, 2014

Strawberry Shortcake Parfait-Under 100 calories!

First of all, Happy Mother's Day! I hope all you mom's out there are having the best, most relaxing day!  

Today's recipe came to me after dinner a few minutes ago and I had to post it immediately! As you all know, it's strawberry season.  I have been getting the best strawberries lately and it inspired me to do something with them.  I've also been doing a pretty strict cleanse, so I have been craving something sweet all day.  

This recipe is very simple, very light, and very pleasing.  I will confess now before you read on, I did use a can of whipped cream from the dairy section in this recipe.  It has 15 calories, 0.5 fat grams and 1 gram of sugar.  Sure, it's not "healthy", but it's not unhealthy either.  :) There, I justified it! 

Ready for the teaser? 


Yes, it looks too good to be true! I know! I was shocked too when I did the math!

Ready for the recipe?


Cleaner Strawberry Shortcake Parfait:

Yields: 5 cupcake size shortcakes

·         1 cup oat flour
·         ½ cup almond milk
·         1 tsp. of vanilla
·         ¼ tsp. of baking soda
·         1 tsp. of baking powder
·         2 tbsp. agave nectar
·         1 tsp. lemon zest


What you will need in addition to these baking ingredients are:

  • Fresh sliced strawberries
  • 1 can of whipped cream from the dairy section


Line a muffin tin with 5 wrappers.

Mix all ingredients and bake at 350 for 12-15 minutes.

Done!


1 parfait consisting of 1 shortcake cupcake, 4 tablespoons of whipped cream from a can, and 3 strawberries sliced = 96 calories! 0 saturated fat! 6.6 grams of sugar! 2 grams of protein! 


The lemon zest in these cakes is heavenly! It adds a nice fresh flavor that you can't leave this ingredient out! I even suggest adding a touch of the lemon juice to the batter as well. Also, I cut my shortcake cupcake in half and added a few little bits on top as you can see:)
Under 100 calories! 0, yes that's a zero, saturated fat! Wow!

As always, enjoy friends!! I sure did!

Friday, May 2, 2014

Truffles Without The Trouble!

Truffles without the trouble is the absolute perfect way to describe these little balls of joy! They are simple, healthy and only contain 5 ingredients! Yes, Only 5! :)  If you have kept up with my blog and know who I am, you know that a.) I am a sugar addict, b.) I use a ton of oat flour, so be prepared, and c.) that I am a sugar addict. Ha!

I was sitting at home earlier today after a lovely visit with an old pal and started thinking about how much I'd love some chocolate truffles. Random, I know!  So, I then thought, what do I have in my pantry to play with? I knew I wanted to make it simple and healthy of course, but I didn't  have any chocolate on hand. So, like any normal person, I made some.

Ready for my usual teaser photo?


Yes. They were that good too. 


So, for the first time ever, I made truffles.  Then as I just sat down to write this blog, I Googled a traditional truffle recipe.  The recipe I came up with was one that took an hour to make. 
Who has that kind of time? Geez.  

These took 15-20 minutes at best.  The recipe I found also called for heavy cream-FAT, butter-FAT, corn syrup-TURNS INTO FAT, and 18 ounces of chocolate-FAT FAT FAT. Now, this did make 30 truffles, but dang people!  I know truffles are supposed to be decadent and rich desserts, but that's a little much. Now, I am no idiot. I know that THAT truffle would be AMAZING! Who am I kidding. Does my truffle compare in taste and lusciousness? No, I'm sure not, but my truffle will hopefully quench the desire for that fatty truffle that will leave you with regret. 

Ok, enough. Recipe time!

Yields 10 truffles

For the filling/center of truffle: 
  • 2 tablespoons of all natural peanut butter (the kind that requires stirring)
  • 1 tbsp of agave nectar
  • 1 tbsp of melted virgin coconut oil
  • 3/4 cup of oat flour (ground whole oats)


That's it.  Mix all ingredients until well blended.  Roll into little balls and sit on a plate.  Put in refrigerator for 10 minutes to allow them to set.  In the mean time make your chocolate.


 Chocolate:
  • 1 tbsp of melted virgin coconut oil
  • 1 tbsp of agave nectar
  • 1 tbsp of cocoa powder


Mix until well blended.


Once the filling/center for the truffle has set in the refrigerator for 10 minutes and is hardened, remove and roll individually in the chocolate and return to the plate.  The chocolate will harden almost immediately because coconut oil will reform at about 72 degrees.  You could add some shredded coconut or maybe even dust some cocoa powder on top.  But I made mine just as I have described and they are magnificent!
Keep these refrigerated until eaten because coconut oil will melt at anything higher than 72 degrees and you'll just have some messy little desserts.


A few nutritional facts for all 10 Truffles:
Calories: 550
Sugar: 33 grams (from a natural source-Agave Nectar)
Only Good Healthy Fats from Coconut Oil and Natural Peanut Butter(I Promise)


As I have stated before, I highly recommend you doing your research on healthy fats.  Coconut oil does have a high number of saturated fat grams, 13 grams per serving.  BUT, these are good fats that actually allow your body to get rid of the bad fat cells.  Bad fat actually attaches itself to the fat in coconut oil and leaves your body.  There is a great article on newfamilyliving.com on coconut oil that I highly recommend!
I strongly encourage you to make these heavenly little treats! 
Thanks everyone for reading! 

Sunday, April 27, 2014

The Perfect Soup For Spring!

Spring is here and summer is near!  So many people believe that once it starts warming up outside that soup is off the menu.  In this house, we eat soup and chili all year long.  I've never understood why people find those to be seasonal meals.  I mean, every meal you eat is cooked hot and ready right? So why is soup any different?  So, despite all the spring/summer soup haters, I am posting my newest obsession: great northern bean and kale soup!  Actually, I am posting a 3 bean rendition of my great northern bean soup because I made it tonight for the week's lunches and I didn't have enough white beans, so I improvised and used 1/3 white beans or great northern beans, 1/3 pinto beans and 1/3 red kidney beans.  Needless to say, this is one healthy soup!  And I must say, this 3 bean version might actually trump the original recipe I came up with! 

Here are a few little health facts on beans for you all. 

Kidney beans and pinto beans are a very good source of cholesterol-lowering fiber, as are most other beans. In addition to lowering cholesterol, kidney beans and pinto beans high fiber content prevents blood sugar levels from rising too rapidly after a meal, making these beans an especially good choice for individuals with diabetes, insulin resistance or hypoglycemia.
People who have high intakes of legumes/beans are at 82% less risk for heart attack! (Beans, beans, good for the heart indeed! hehe)
1 cup of great northern beans supplies 21% of your required iron intake daily, 48% of your daily fiber, and 20% of your potassium.

These facts alone should convince you to make this soup!  Beans are also low in fat and high in protein!

Photo for convincing? Ok. :)


Yum Yum-Cook You Some!
 
As I have mentioned before, I cook a big pot of soup on Sunday night for lunch for Monday through Wednesday.  Then another pot on Wednesday night for Thursday and Friday.  Aaron takes some to work and Sophie and I eat it daily for our lunch as well. 
This is a great way to:
a.)always eat a healthy lunch
b.)save a ton of money on eating out while you are at work, and...
c.)your lunch is already prepared for the week, so you save yourself from worrying about one more detail in life-what to eat for lunch!
 
 
Okie doke, recipe time!
 
Ingredients:
  • 1 cup dry great northern beans
  • 1 cup dry pinto beans
  • 1 cup dry kidney beans
  • 1 tbsp. of salt
  • 4 cloves of garlic
 
Cook all three types of beans and seasonings in one big pot for about 1.5-2 hours or until they are tender.  I always throw a few cloves of garlic in with my beans while they are cooking for flavor. 
 
Now, on the side in a sauté pan cook until tender:
 
  • 1 bunch of kale
  • 3 carrots sliced
  • 1 onion sliced
  • 1 cob of corn-I cut the kernels off and threw them in. You can also use a can, drained.
  • 2 tomatoes cubed
  • 1 tbsp. of garlic powder
  • 1 tbsp. of onion powder
 
Once all these vegetables are tender and the beans are cooked through, drain the beans, but do NOT wash them.  Put all ingredients back into the pot you cooked your beans in, fill with 2-3 cups of water.  Add another tsp. or so of salt to your taste and 1 tsp. of pepper or to taste to season the soup broth.  Simmer on medium-low heat for 20 minutes just to marry all the vegetables in flavor. 
That's it! Easy as that. :)


Doesn't that look delicious?
Super healthy. Super easy. Inexpensive.  And so very yummy!
 
Now, I have made this soup several times with my homemade bone chicken broth as the base and personally, I recommend that the most if you have some chicken bone broth.  You can use some free range chicken broth from a carton if you prefer and I know the flavors will be great!
 
Please try this one folks!  I most definitely encourage you to follow my soup lunch train :)  This is an easy way to maintain a healthier lifestyle and stay on a cheaper food budget.
Enjoy!