Wednesday, February 26, 2014

The Ultimate Clean Burrito!

Until two weeks ago, I have never cared or looked much into a gluten free diet.  I am not allergic to gluten, and until recently no one I cook for was either.  My husband broke out recently with this skin condition, and after going to see a specialist found that it is actually a skin disease which requires him now to eat a gluten free diet.  He has eaten gluten is whole life, but now suddenly his body is reacting much differently to it.  This is normal and happens everyday.  So, sad to report, no more yummy gluten in this family! With that said, there are definitely plus sides.  In result of this new diet, we will definitely consume less carbs, which means less sugar, and less unwanted lbs. on my body. Right?  It pays to always look up when a big change like this occurs. 

Ok, on with today's recipe/meal idea!  From now on, you will only be getting G-free recipes here, which like I said will happen to end up being low carb as well. 

We eat a lot of "Mexican" food in this house. I have made burritos, or my Mexican spread as I call it, for years! One of the items is the chicken chimichangas I posted about a few weeks ago.  I know several of you have tried those yummy little pieces of heaven, and I've really enjoyed hearing about your experiences with my recipes so far.  So, I encourage you to try this meal as well.  As usual, it's super easy and this entire meal-2 burritos-comes in under 400 calories. Yes. Crazy right?


As you see, no more tortillas here! I know there are g-free substitutes to tortillas.  I actually make a mean oat tortilla, but I really love these lettuce wrap burritos.  They are so delish and you really don't miss the tortilla.

What I did here is cook black beans from a dry bag. I added garlic and onion powder to the beans, and salt and pepper.

This burrito contains all of the following and I highly recommend each and every ingredient:
  • 1/4 cup black beans per burrito/wrap
  • diced tomatoes
  • 2 tbsp. of guac per burrito(I make my guac simple-avocado, garlic, cumin, s & p, and lemon)
  • 2 tbsp. of mozzarella
  • salsa-to taste
  • 1/4 cup of Mexican quinoa-this recipe I just came up with from my wondering, curious little mind last night and boy o boy!!! I ended up just eating spoon fulls after dinner was over. ha

Mexican quinoa:
  • 1 cup of any kind of quinoa you want
  • 1 tbsp. of garlic powder
  • 1 tbsp. of onion powder
  • 2 tsp. of chili powder
  • 1/4 tsp. of salt
  • 1/4 tsp. of pepper
Cook your quinoa like you would rice.  1 cup of quinoa-2 cups of water.  Put all of these ingredients in together and cook until done. Simple. Super Healthy! and OMG Delicious!


Extra notes:  I use iceberg lettuce for my wrap.  Cost is .99 for the entire head of lettuce, so this meal is also very inexpensive. 
Take the head of lettuce and at the "butt" of it, cut each piece of lettuce off at the root.  Then slowly and carefully peel it off.  Try super hard not to rip the lettuce.  This is a delicate process.  I recommend maybe watching a YouTube video if this seems too difficult to understand by reading it.
 

See where I am holding the lettuce, each leaf connects right there.  You can cut the leaf off at the place of growth and just peel it off for the perfect bowl or wrap.


Now, pack that lettuce leaf full of goodness. I've done this with chicken and veggies too and it's super yummy.
 
I had two. Then some extra quinoa.  This meal is so filling, so delicious, and I almost guarantee you it will become a staple in your weekly menu. 
 
 
There's little preparation here folks.  Once you put your beans on, or if you want, buy a can...all you do is cook your quinoa-20 minutes max. and prepare your guacamole-you're set! Dinner is done and it's healthy!  This is also a time where I recommend cooking a big ole pot of beans and having some leftover for the next night.  I did and I am making Mexican chicken soup for the rest of the week for lunches-blog to follow with the recipe I come up with. It's always an experiment! :) Enjoy everyone!! Thanks for reading!

Friday, February 21, 2014

BBQ Chicken Sammy Clean'er' Style

Today's post is definitely more of a clean'er' recipe than a clean recipe. It's also very simple. This was our "cheat" meal last weekend, which still came in under 500 calories for the meal. Yes. Ha. The cheat here for me was I used store bought bbq sauce-I know you're disappointed! But I couldn't see making the sauce with the schedule we have going right now, so instead I bought a bottle-forgive me?
As I have stated before, some posts will be clean, some will be cleaner-this is just a cleaner version of the fatty, calorie packed bbq sandwich that you can do from home, and get that fix for "real bbq". 


Man, this was so good, seeing it again makes me hungry!

Ingredients:

  • 1/2 a chicken breast was plenty for Aaron & me both a sandwich.  I bought organic chicken from Whole Foods-boneless and skinless. So, if you have a family of 4-one whole breast should do..so on and so on.
  • 1 tsp. of garlic powder
  • 1 tsp. of onion powder
  • dash of salt and pepper to taste

Method:

Sautee your chicken breast with seasonings, shred and top with minimal bbq sauce (to save the calories, sugar, other mystery ingredients). Again, I know it's not great of me to use store bought sauce, but this is a blog about "cleaner" versions of meals for you and your family. :)


As you see, I also bought a pre-made loaf of bread from Whole Foods. This is fresh, preservative free bread. I recommend if you are going to eat bread, buy it from the fresh bakery department from your grocery store.  I'm sure you've all seen the news lately with they hype around the bread companies using the yoga mat ingredient...well, avoid buying the breads that are able to set on a shelf for weeks without spoiling.  When you buy fresh, it only lasts a couple of days or so.  I do refrigerate mine and it lasts a bit longer. 
 
Anyhow, I simply sliced a thin slice and made an open face sandwich to avoid the extra bread in my diet.  We are mostly bread free people, but on occasion, I.e. cheat meal time, we will have some..after all, it's so yummy!!


Slice up some sweet potatoes, throw them in a bowl with a tad bit of sunflower oil, salt and pepper-I even use garlic powder here- and bake them for 30 minutes at 350. Perfect side to this yummy, open-faced, cleaner style bbq chicken sandwich.  This is a great treat and great substitute to your usual bbq sandwich. 
We are southerners after all, we need our bbq from time to time!  Enjoy this cleaner meal idea.  We certainly do!


Monday, February 17, 2014

5 Uses-Avocado's!

Hello all.  One thing I want to incorporate more of with my blog is a "5 uses" portion.  I previously posted a "5 uses for the over ripe banana" and a lot of people really enjoyed that information.  It's not like the information is new that I provided, but it was in one place.  That's what I want to do with today's and upcoming "5 uses" posts.  I chose avocado's for today because they are one of my absolute favorite foods. I love avocado's.  We eat them several times a week.  Avocado's are an extremely versatile food as well as a super food for your body.  Also, did you know that an avocado is really a fruit? Confusing little guys! Maybe that's why they pair so well with tomato's?  Here are some nutritional facts for your brain:


  • The avocado is virtually the only fruit that has monounsaturated fat.
  • Avocados are cholesterol- and sodium-free, and more than 50 percent of the fruit's fat content comes from monounsaturated fats.
  • Avocado's help prevent inflammation.
  • Arthritis—including both osteoarthritis and rheumatoid arthritis—are health problems that have received special research attention with respect to dietary intake of avocado.
  • In healthy cells, avocado works to improve inflammatory and oxidative stress levels. But in cancer cells, avocado works to increase oxidative stress and shift the cancer cells over into a programmed cell death cycle (apoptosis), lessening the cancer cell numbers. In other words, avocado appears to selectively push cancer cells "over the brink" in terms of oxidative stress and increase their likelihood of dying, while at the same time actively supporting the health of non-cancerous cells by increasing their supply antioxidant and anti-inflammatory nutrients. http://www.whfoods.com/genpage.php?tname=foodspice&dbid=5
There are sooo many more benefits to name, but I will let you do some of the work! :0) It's seriously worth your time. Here are 5 ways I love to incorporate avocado's into my meals.

1.) Quinoa and avocado salads are amazing! They pair so nicely together because they both have a nutty flavor.  And it is a super filling meal.


2.) Eggs and avocado. Yummy! I make a mean scrambled egg, spinach & avocado
pizza topped with mozzarella and green onions. Yes please.  It's simple and very
filling!


3.) Baked avocado & egg breakfast or dinner item! We actually did this for a dinner.
I paired it with some "cleaner" style mashed potato pancakes. I simply boiled the potatoes with garlic cloves. Mashed them together with greek yogurt and
seasonings of choice (garlic and onion powder). Seared them in a bit of sunflower
oil to brown each side. Yums. The avocado & egg-simply carve some of the avocado
out and crack eggs in the area of the pit. Bake at 300 for 20 minutes or until done.


4.) Avocado's also make a wonderful substitute for pasta sauce. I posted before the
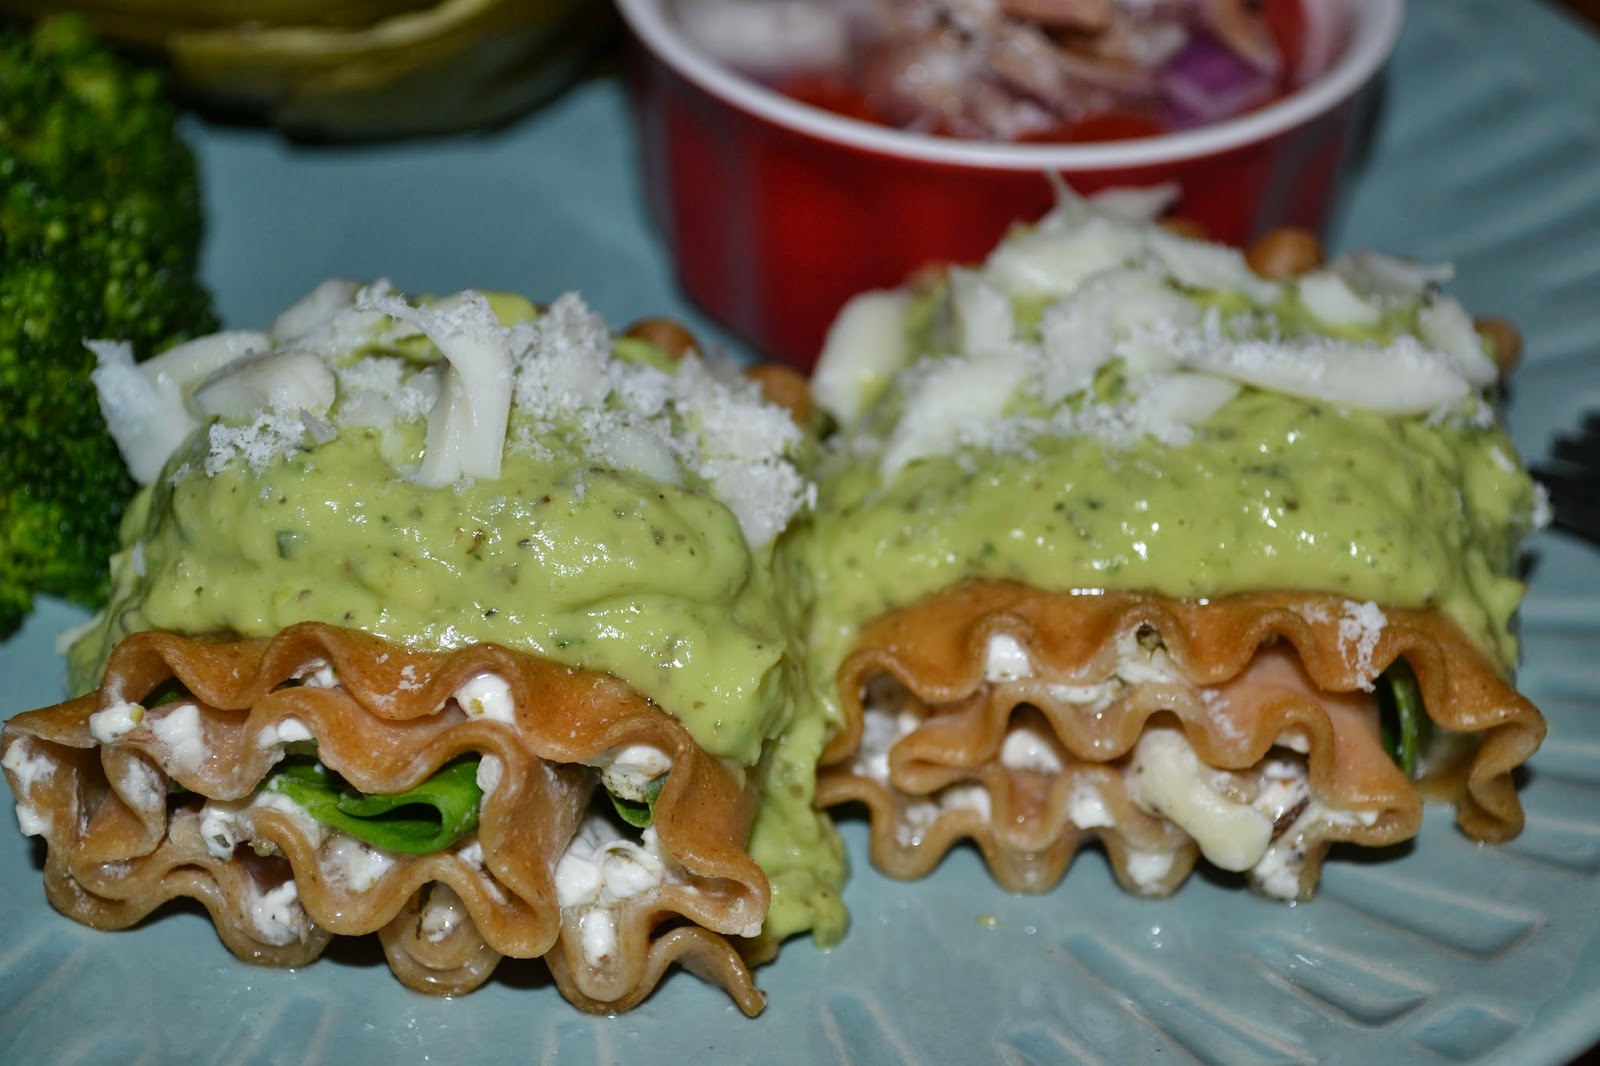
lasagna rolls I made with an avocado sauce(pesto) and it's great.  I also recommend
simply taking your avocado with spinach, garlic,  salt and pepper, grated parmesan, lemon juice(2 tbsp.)
& sunflower oil. Process it together and you've got a clean "Alfredo".  Pour over your
pasta of choice or spaghetti squash or even over a nice roasted vegetable medley.
Can't go wrong with this :)


5.)Last tip: Use avocado's in a homemade facial!! Yes. Easy breezy. 
Ingredients:
  • 1/2 soft avocado
  • 2 tbsp. hot water
  • 1 tsp. honey
Preparation and Usage:
Mash the Avocado with a fork or in a mixer. Dissolve the honey into the water
add it to the fruit. Put it into your face, avoiding your eyes and mouth. Let sit for
10 minutes or so and rinse.  Your face will be so refreshed!


Again, I know these are all tips you've seen on pinterest or can gather from a quick Google search, but I wanted to post a few for you to have at one click! I love this food. It's so awesome for you. 
We eat avocado as a side a lot of nights. How easy is that on your load? Just slice it up and put it on the plate. It's so filling! This is our "meat substitute" if you will. 
You can use it for a substitute for mayo, ranch, butter, cream, and even make it into a yummy pudding/mousse.  I recently also tried this as a frosting, it turned out pretty good, but I need to tweak it more before posting.  I encourage you all to incorporate this food into your life. It's benefits are too great to overlook.  Like I've said, it's about the small changes.  Try guacamole instead of cheese dip.  Use avocado instead of mayo or cheese on your next sandwich.
Last tip that will save you money too. Store your avocados in the refrigerator. Yes. It keeps them much longer! But if they are too firm, let them sit out for a couple of days until they are just barely tender enough to squeeze, then refrigerate. Trust me folks! :) Good day and thanks for reading!!


Friday, February 14, 2014

Easy Breezy Cleaner Banana Bread

One of my absolute favorite things to bake is banana bread. Banana bread can almost be treated like that big pot of soup you make at the end of the week. You can throw just about any left over fruit in with it and it'll come out tasting amazing.  This one I will post today is just a basic recipe for a banana bread but with only clean ingredients.  Like a couple of recipes I have posted previously, this one can classify as more of a clean recipe than cleaner. So, BONUS!


This recipe is very very simple. Of course that is the purpose of my blog. To provide you all with easy enough recipes to make on a daily basis, even if you are a working mom.  This banana bread could serve as breakfast for a couple of days. However it is so delicious it gets eaten pretty quickly in our house of 2 and a toddler.  My 17 month old loves this tasty food!

Ingredients:

  • 2 ripe bananas mashed
  • 2 cups of oat flour (ground oats)
  • 1 egg
  • 2 tsp. cinnamon
  • 1 tsp. baking powder
  • 1 tsp. baking soda
  • 1/2 cup milk
  • 1/4 cup coconut oil or sunflower oil
  • 2 tbsp. of honey or agave
  • 1 1/2 tbsp. of vanilla
Throw all ingredients in a bowl and mix together.  Simple as that. Bake at 350 for about 30 minutes in a loaf pan(oiled mine with coconut oil). Keep an eye on it (toothpick test). Some ovens take longer.  Your standard banana bread recipes take upwards to an hour.


The difference between your normal banana bread recipes are my recipe is oat flour and a tiny bit of honey.  Other normal banana breads have at least 1/2 cup to a cup of sugar plus all the flour that is so genetically modified and processed. Yuck!  So, do yourself and your family a favor and make this version and see how it fits into your lifestyle. It's all about the little changes you make in your eating habits that make the biggest impact. Because we all know how hard it is to stick to any "diet". Well, if you start with the little changes, it will lead to a big difference!

 
There you have it folks. It's just that simple. Easy Breezy Cleaner Banana Bread that will certainly please that belly of yours and your waistline! :)
You can easily throw some blueberries, strawberries, apples, cranberries or any nut of choice in this bread and it would be delightful!
You can also take a little extra honey or agave and mix in a little cinnamon, maybe toast some almonds or pecans and throw in the honey and cinnamon and pour over your slice of banana bread for a little extra sweetness. I highly recommend this for a dessert type of treat!
Thanks for reading! I hope you enjoy this recipe as much as we do!

Wednesday, February 12, 2014

Clean"er" Eaters "Cornbread"-Soul food!

 
As I have become quite the extreme cleaner eater, I found myself craving my beloved cornbread.  I cook a lot of soups in this house, and I use to bake a pan of cornbread to partner with them.  Well, since we have adopted more of a clean to cleaner lifestyle, cornbread didn't fit into the plan.  After 6 weeks of no cornbread, I had to come up with something to quench that craving.  After all, if we don't feed that hungry beast inside of us, it will grow into a relapsing problem! Right? That is where I find most of the people I have talked to failed.  They would start to crave the foods that weren't good for them, and if they didn't substitute it with some healthier version, they'd just give up all together. I feel that.  Like I've said before, "clean" eating is too hard for me personally, that's why I am developing my "cleaner" menu of foods and it's working great for us! I went from 136 to now 127-and that's with some nice little side abs coming in too! What?? Braggin' I am! My husband went from 156 to now 144 and he is looking mighty fine ;)  This progress has happened since the first week of the year. That's it. Anyway...ready for a delicious photo followed by this yummy recipe? Got it!
 

This "cornbread" is actually a savory muffin.  I used oat flour-just like I do for most all of my recipes.  Oats are so good for you.  They are a cancer fighting, immune system building, low calorie, no fat, crazy awesome food for your body and brain.  And they are inexpensive, which is also great.  I buy my whole oats at Whole Foods.  They are actually much cheaper there than at Kroger surprisingly.  You can buy in bulk at Whole Foods at $1.39 a pound and they are organic.  The oats at Kroger are usually $1.79 for less than a pound. 


Ingredients:

  • 1 1/2 cup of oats ground into a flour
  • 1 egg
  • 1/4 cup of Greek Yogurt or you can use 1/4 cup of milk
  • 1 tbsp. of onion powder
  • 1 tbsp. of garlic powder
  • 1 tsp. of baking powder
  • 1 tsp. of baking soda
  • 1/4 cup of sunflower oil
  • 1 tsp. of salt
  • 1 tsp. of pepper
  • 2 tsp. of sage

Instructions:

Throw everything into a bowl and mix it. Easy as that.  If the batter comes out a little too thick then add some milk or more yogurt.(whichever you chose to use)
If it comes out too thin, then add a touch more of oat flour.

Bake at 350 for about 15-25 minutes depending on your oven.  I baked mine in muffin tins so they bake faster.  If you make this into more of a loaf or pan of "cornbread", then it will take a bit longer.(that's why I have a large span of time there) So, use your cooking sense and keep check on these once they hit that 15 minute mark in the oven. (toothpick test them)

The Greek yogurt will add more of the tangy flavor like a buttermilk cornbread would taste like, so if you prefer a basic cornbread or sweeter, then just use milk.

I chose Sage for my muffins.  It worked out amazing! I love Sage. It really gives it a wholesome flavor and it feels like a pop of Thanksgiving in your mouth! You can substitute different dry herbs here if you want to do different flavors. If you want more of an Italian "cornbread" then do some dry oregano or basil. I really don't think you can mess this recipe up.  I initially was going to do chili powder in this one, but decided Sage for today's vegetable soup. :)
 

One of the best things about this babe is one slice or muffin is under 100 calories. To my calculations they run you about 80 calories per piece. So enjoy 1 or 2 or even 3 if you are having a low calorie bowl of soup.  Your body can use it right??


Monday, February 10, 2014

Cleaner Chocolate Candies For Your Sweetie

It only seems appropriate that I post some cleaner chocolate candies you all can make for your sweethearts! Or for yourself:)  Today I will include 3 different candies you can make and of course I have to include a recipe to make the most popular food item for this Valentine's Day holiday...Chocolate covered strawberries.  Though I am a fan of dark chocolate chips and I am not telling anyone not to consume them (I do daily), with these recipes, you will actually be making your own chocolate.  Don't fret, it's super easy!

Now, good dark chocolate is good for you-in moderation.  But this chocolate that you will make is super crazy good for you. Like...crazy amounts of goodies in it for your body.  One of the main ingredients is coconut oil which holds amazing benefits for your health.  Did you know that Coconut oil can boost thyroid function helping to increase metabolism, energy and endurance. It increases digestion and helps to absorb fat-soluble vitamins! Did you also know that Coconut fats have special fats called medium chain triglycerides (MCTs). It has been shown that breaking down these types of healthy fats in the liver leads to efficient burning of energy. One study found that women who consumed 30 milliliters (about 2 tablespoons) of coconut oil daily for 12 weeks not only did not gain more weight, but actually had lowered amounts of abdominal fat, a type of fat that is difficult to lose, and contributes to more heart problems.

Enough information.  Here's your first look at one candy we will be making.


This is a cleaner version of the amazing Snickers candy bar! I got the recipe from another vegan site, and changed up several ingredients to fit what I had handy in my pantry & they are nothing short of amazing!!

For this recipe, you will need:

For the Chocolate:
  • 1 Cup melted virgin coconut oil
  • 1/2 Cup cocoa powder
  • 1/4 Cup agave or honey
Yes that's it! Just mix those 3 ingredients and you will make the most delicious chocolate.  You can even pour this mix alone into muffin wrappers, freeze it for an hour, pull it out and enjoy as is. Or you can add the next few steps and make this cleaner Snickers!
 
For the center:
  • 1 cup of dates - soak in warm water for about an hour
  • 3 tbsp. of agave or honey
  • 2 tbsp. of fresh made peanut butter - you can use a good natural PB or almond butter
  • 2 tbsp. of coconut oil
  • 2 tsp. of vanilla
  • dash of salt

Throw all ingredients into your food processor and process until smooth. That's it!
Now, line your muffin pan with muffin wrappers, pour one thin layer of the chocolate mixture in each wrapper, then scoop a layer of the center mixture in, then top with a layer of chocolate again.  I threw some peanuts in the middle too. After all, Snickers has peanuts in it too right?? Yes!

 
I mean, seriously?? Yes. I am in love with these chocolate candies!
 
 
Now, for a couple more ideas to make for you or your sweetie.  Simply take the chocolate recipe from above, and either throw some peanuts or nut of choice in, roll it around, then drop on some wax paper.  Freeze for just 15+ minutes and you've got a much healthier version of chocolate covered peanuts and chocolate covered strawberries.  You can do this with any fruit or nut and it'd be delicious and you can impress everyone with your skills!


The only warning I have for you is you will want to eat all of your product in one sitting!


Unfortunately, for this next chocolate treat I only have a link to my instagram for you to view a photo. http://instagram.com/p/cAfSMlqgdn I sincerely hope you check it out or go into this one blindly because you will NOT regret making this treat!

Peanut Butter cups-cleaner version (more like clean version)
(recipe will make 6+ PB cups depending how big you want each one to be)
For the peanut butter filling:
  • 1/2 cup of oats ground down into a flour
  • 3 tbsp. of peanut butter
  • 2 tbsp. of melted coconut oil
  • 2 tbsp. of agave or honey
Mix all ingredients and line your muffin pan with muffin papers and scoop a good tbsp. of mix into each tin.

Use the same recipe from above for the chocolate(just different measurements):
  • 1/4 cup of melted coconut oil
  • 2-3 tbsp. of cocoa powder
  • 2-3 tbsp. of honey or agave
Now, scoop a good tbsp. of this chocolate mixture over each peanut butter mixture and freeze for about an hour before eating!
These babies will blow your mind!

Chocolates can be very pricey this time of year.  This is where I defend the price of some of these ingredients.  One jar of coconut oil will set you back less than the cost of one box of chocolates and you can use it on all of these recipes & still have leftover.  Dates are about $3-$4 for 1-2 cups. That will make two batches of the Snickers!
Each one of these recipes contain HEALTHY fats unlike a box of chocolates!
So I encourage you to treat yourself to some homemade healthy chocolates!! Enjoy!!


Friday, February 7, 2014

Pasta-less Spaghetti & Meat-less Meatballs-Don't knock it til you try it!

Today's post is one that even left my husband and I staring in shock at one another after the first bite.  Being the cleaner eaters that we are, we are use to a mostly vegetarian lifestyle, but this meatless meatball most definitely left us full and satisfied any meat cravings we each may of had.  I know there are a lot of skeptics out there who say to me all the time, "I can't give up meat" or "I don't know how you do that girl".  It's all about good substitutes and seasonings. It's about mind over matter. People are so naïve to think we "need" meat in our diets. We don't.  We can get all the different proteins we need from other animal protein sources or even a lot of plant based protein sources.  Actually, meat is extremely hard for our bodies to break down.  If you do your research, you will find that a single piece of meat can remain in your body for months before it will break down and pass it as waste (TMI? well, you need it. Quit eating so much meat!) 

Ok, enough lecturing and let's get to the recipe right? First I will say, that this meal will require some time.  I suggest maybe doing this one on a Saturday or Sunday where you have some time set aside to escape in your kitchen and just enjoy the cooking process.  Not only did I create a delicious, cleaner spaghetti & meatball for this meal, I also pickled my own zucchini and onion for a salad topper which also served as our dressing! Dressings are typically full of sugars, corn syrup and other mystery ingredients! So anytime that you can make something simple and homemade to serve as your dressing, I encourage it.  We also use salsa a lot as our dressing.. Anyway-photo then recipe!


I mean, seriously, does that not just look heavenly? Doesn't it look like a true plate of spaghetti and meatballs? Well, it's not! It's spaghetti squash and black bean meatballs! Yes indeed it is friends. Yes it is. And it's nothing short of delish. I seriously would put this against almost any plate of spaghetti and meatballs. *hint I said almost..yeah, I know how awesome the real deal is, but this is definitely a clean version of the meal and it will give you that fix without the guilt. So, there. My point is made.

This is going to be a bit longer than usual blogs because it requires more steps.

Ingredients for the "spaghetti":
1 medium size spaghetti squash will make a decent size portion for three people or maybe 2 adults and 2 kids.

Instructions:
Preheat your oven to 350.  With a small knife, puncture the squash all over the body to ensure that it will not burst under the conditions of the heat. Bake for 1 hour in a shallow dish.

Once you've baked her for an hour, remove from oven and let cool for a bit.  Once it's cooled, you are going to treat it like a pumpkin at first.  You will cut it in half, and scrape out the guts.  You can save these seeds and bake them up for a great and nutritious snack! Or you can discard them. Whichever. 
Anyhow, Once the guts are removed, grab a fork and a bowl.  Scape in long strokes the inside of the squash. It will shred out and look like spaghetti noodles(some of the shreds will be short, some long). Once you have scraped all you can out of the middle of this squash, you will boil the scrapings or "spaghetti" just as you would pasta. In salted boiling water, place the "spaghetti" and boil for about 8 minutes.
Once those are done, drain them and set aside unless you are ready to top them off.
Enough with the squash, on to the meatless meatball.

Ingredients for the beanballs-haha.
1 cup of black beans- made 5 rather large bean balls for me.  It will probably make 8 smaller balls.(strain and rinse)
1 egg
4 garlic cloves
1/4 cup chopped onion
1/4 cup of shredded mozzarella
1 tbsp. of garlic powder
1 tbsp. of onion powder
1 tsp. of dry oregano
1 tsp. of dry Italian seasoning
1/4 cup of oatmeal

1st I would make the breading for your beanballs in your food processor so you aren't having to wash it out over and over.  You will "bread" the outside of the beanball so a nice crust will form when you sear it.
1/4 cup or so of oats
1 tsp. of garlic powder
1 tsp. of onion powder
1 tsp. of salt
1 tsp. of pepper
and if you want any herbs-dry basil, oregano... throw those in too.
You could also throw some parmesan cheese in this breading mixture(buy fresh on the rine and grate it, You will thank me)

Now, simply throw all of that in the food processor until well blended and the oats have ground down into a flour like consistency.  Dump onto a plate to roll the balls around in before searing. Done. Now you can use the same processor without washing to do the bean ball mixture.

For the bean balls: Just throw all ingredients I listed in the recipe in the processor and process until well blended. That's it. Then you will form them into balls and roll around in the "breading" mixture I listed above.  Put about 1-2 tbsp. of sunflower oil in your nonstick pan and sear each beanball on each side until brown and crispy!

Now, for the marinara, I made my own of course! Ha! I will repost it from the previous lasagna blog just for you :)

So here's my sauce recipe:
5 roma tomatoes
1 tbsp. of sunflower oil
1 tbsp. of dry oregano
1 tbsp. of dry basil
2 tbsp. of chopped garlic
1 tsp of pepper
1 tsp of salt

1/4 cup of onion
 
Peel and dice the tomatoes, put in a sauce pan. Add the garlic cloves, sliced onions, dry oregano, dry basil, or Italian seasoning, salt and pepper. I also throw in red pepper flakes for some spice. You can do whatever you like with this recipe actually. Add olives, capers, whatever!  Cook on low-medium for about 15-20 minutes. Once everything looks like its softened, just throw in your rinsed out food processor and blend together.  I used my handy emulsifier, but a processor will do the same trick.  Put back in the pan and cook another 5-10 minutes just to "marry" the ingredients. Done.


As I said in my intro, I paired our main dish with a side salad of spinach and homemade pickled zucchini and onions. It's so easy. Simply boil 1 cup of water with 1/2 cup of vinegar and 1 tbsp. of salt. Once boiling, add your vegetables of choice and remove from heat. I let my vegetables soak for about 5 hours in the fridge. But if you only have 20 minutes, they will still be delish!
 Now, what I did here was just throw the pickled vegetables onto the spinach and let the vinegar from the veggies be the "dressing". Trust me, it's very good.


That's it people.


 Serious goodness happened here.
It's very hard to even work with
this post because it's been
two nights since I made this
and it's sending me into withdrawal
mode. No kidding.  Look at that photo to the left. Look at the inside of that beanball.
It looks like a meatball!
And tastes just as good too! I swear by it.
 As you see, I did top our pasta-less spaghetti and meat-less meatballs off with some fresh chopped basil. I do recommend this. However fresh basil is usually $2. If you can't find a use for it within a week of purchase, don't spend the extra money. It'll be just as delish without it.  This dish is gluten free. Essentially fat free. Low Carb. High in protein. And very high in satisfaction.
 
Last note-as you see if you've read a lot of my blogs, I use a lot of the same ingredients. Black beans, garlic and onion powder, dry herbs, sunflower oil, onion, garlic... These are staples in our house. Beans are crazy good for you and very inexpensive. I always buy dry bags. I just prefer them.  I truly hope you give this recipe a shot. It does require a bit of work, but it's also about enjoying cooking so that you can really enjoy a good healthy meal at the end of the process. I will also like to add that Sophie loved the spaghetti squash. LOVED it. Was eating it right off of my cutting board actually. ha ha. Enjoy this one folks! We sure did!


Wednesday, February 5, 2014

Cleaner PB n Jelly Sandwiches


This recipe I created today was one that was jokingly requested by my "momma" on Facebook after she posted to me that her lunch was a peanut butter and jelly sandwich and M&M's.  She asked me how to "clean up" that lunch.  Well, being who I am and that I have to be right, at least most of the time, I decided to see what I could come up with.  Now, I must warn you, this is not a sandwich because I don't do a lot of bread in my diet.  What I did is a peanut butter and jelly wrap of sorts.  I made my own wrap, my own peanut butter, and my own jelly.  Now, I will also warn you, this recipe is bordering more clean, than cleaner.  It did require a little bit of work, but it was so worth it.  The jelly you buy at the store is TERRIBLE for you.  No matter how they market it to you, it contains a ton of sugar, and there is no trace of any of the nutrients from the fruit.  I'm not judging you for eating this or giving it to your children, however I hope you at least try this new solution to a peanut butter and jelly sandwich.  It also makes extra so you can store it.  The recipe I will include below, will not make a bulk amount but this can easily be doubled or tripled!

I'll start with a photo so you can see how delicious this is. If only you could smell my kitchen while I was making this wrap (which is basically a crepe or a thin pancake).


Ok, I'll start with the recipe for the wrap:
(this is for 1 wrap, so multiply this recipe as you see fit)

1/4 cup of oats ground into a flour
1 tsp. of honey
1 tsp. of cinnamon
1 egg (I actually only used some of the egg white and stored the rest of the egg for me to use tonight to make supper-stay tuned to next blog for that info.)
1 tsp. of melted coconut oil
2 tbsp. of milk
1 tsp. of vanilla


That's it. Mix it up, and cook just as you would a pancake. Except, swirl this batter around in your pan until it thins out.  I even used a spoon to smear it around so the wrap comes out thin like a tortilla.


For the homemade peanut butter:
Now, if you want to buy your own peanut butter, do so.  Just make sure to buy the all natural peanut butter without all the added stuff to it.  It should have the oil sitting on top of the peanut butter and will say on the front of the container that you need to stir it.  Do stir.

Method on making your own peanut butter is ridiculous easy! EASY.  If you have food processor, all you do is simply buy your peanuts and throw them in your processor, turn it on and walk away. Literally.  It will take about 5+ minutes for it to grind and become creamy.  I bought already roasted peanuts, actually I splurged and bought honey roasted. 


If you buy raw peanuts, roast them in a pan for a few minutes before.  Or if you want to make raw peanut butter, you can do this too, it just may take a few more minutes to process into a peanut butter.


Your peanut butter will look like this photo.  It will be creamy and delicious! And the best
part is you know exactly what went into it!
Like I said, you can blend this whole bag into a peanut butter. This bag of nuts cost me $2.99 and made 3.5 cups of peanut butter. That's cheaper than buying a good jar of peanut butter!  You can store the excess in a tupperware bowl or a jar in the fridge.
 
Now for the jelly portion of this recipe:
All I did was puree some strawberries. That's it.  I tcame out a little runny, so here I would recommend pulsing the strawberries just until they are at a finely chopped consistency.  Although my puree did taste yummy, I recommend keeping some texture to the fruit.  If you don't want to process them, you could also just slice some fresh strawberries in place of the jelly on the wrap. I think it would be great! And again, you aren't feeding yourself or your kiddos anything other than strawberries!
Now, take your
wrap/crepe/pancake, and layer each
ingredient. I spooned down a tsp. of honey first.

 After you get it layered up, it should look about like this, unless you just used sliced berries. But I'm sure you get the point.
 
 
This was so good, just looking at the photos again makes me want to make another!
 

So, there you have it. My cleaner version of a peanut butter and jelly sandwich. Like I said before, this is actually more of a clean version.  I did this one about as healthy as you can possibly imagine!

This whole peanut butter wrap contains under 250 calories. Yep! and only 10 grams of sugar from the strawberries & honey! Yup. Good sugars :)


Monday, February 3, 2014

Cleaner brownies a la mode-Yes please!

Tonight's experiment was one that I have been wanting to try for a long time.. I've read multiple recipes and descriptions of the infamous black bean brownie.  Well, I was hesitant to try this food. Just doesn't sound great.  But, I started making garbanzo bean chocolate chip cookies a while ago and they are one of my absolute favorite ways to make chocolate chip cookies, so I began to think, well why not try the ole bean brownie recipe?  So, I did.  One promise I will make, ok wait, 2 promises about this dessert are: 1. They do NOT taste like black beans AT ALL. 2. The banana "nice cream" does not taste like one big banana. Promise. 

Now, all the black bean brownie recipes that I found still included sugar. Well what is the freakin point in that? I'll just make the real thing if I am still going to use sugar! Right? This made me angry and determined to make it even cleaner by using something natural.  I made a cleaner version of all the black bean brownie recipes I found. Hilarious. I cleaned up a clean recipe. Haha. I have outdone myself! 

Look at this yummy dessert! Totally guilt free!!


Ready for my recipe?

Brownies: (made 12-2 x 2 brownies)

1 cup of black beans (unseasoned, drained and strained) (I cooked mine from dry and cooked some extra because I am doing black bean burgers tomorrow night!)
1/4 cup of Honey(raw)
1/3 cup of unsweetened cocoa powder
1 tsp. of baking powder
1 tsp. of cinnamon
1/4 cup of chopped pecans
2 tbsp. of coconut oil
1 tbsp. of flax seeds ground
2 eggs
1/4 cup of 60% dark chocolate chips are optional.  However, I didn't do any this time.

Directions:
Take your clean beans and all other ingredients(except the nuts) and throw them in a food processor or blender and blend until smooth.  Then throw in your nuts and pour into an 8x8 pan that you have greased with a little extra coconut oil.  Bake at 350 for 30 minutes.


Now, the "a la mode" comes from my banana "nice cream" that I posted about in my blog "5 uses to use that unwanted ripe banana". 


Simply take a slightly over ripe banana, one with just a few black spots on it-not completely black, peel it, slice it, and freeze it in a bag.  Once frozen, put it in a blender or food processor, add about 1 tbsp. of milk and 1 tsp. or so of cinnamon and blend it until creamy. (1 medium banana makes about 1 cup of the nice cream)
 
Now, if you think for one second "My kids are not gonna like that"..Oh, yes they will! AND best part is it's only bananas!! Super healthy. Super delish! We eat this all by itself all the time! 105 calories for the "nice cream". Can't. Beat. That. :)
 
 
My husband allowed this mess to happen, so my husband cleaned her and the mess up! :)
 
 
Now, for the best part! If you come out with 12 brownies like I did, they are only 87.5 calories each!  2 grams of fat & 4 g of protein.  Mind you, these 2 grams of fat are HEALTHY fats from the coconut oil, eggs, and pecans. Yes. Yes. Yes.  The "nice cream" is 105 calories.  And the three of us split the serving (it makes about 1 cup).  So, for us, we each consumed about 115 calories for our Cleaner Brownie A La Mode! Enjoy this one people!
Thanks for reading! Good day to you all!